Every little helps when trying to get your content noticed on social media, and having an eye-catching sharing image could be the difference between getting someone passing you by or someone clicking through.
This post will guide you by creating dynamic social sharing images unique to each page/post using Firebase cloud functions, Cloudinary and Nuxt.
If you prefer learning this sort of thing in a video we've got you covered, if not continue on reading below.
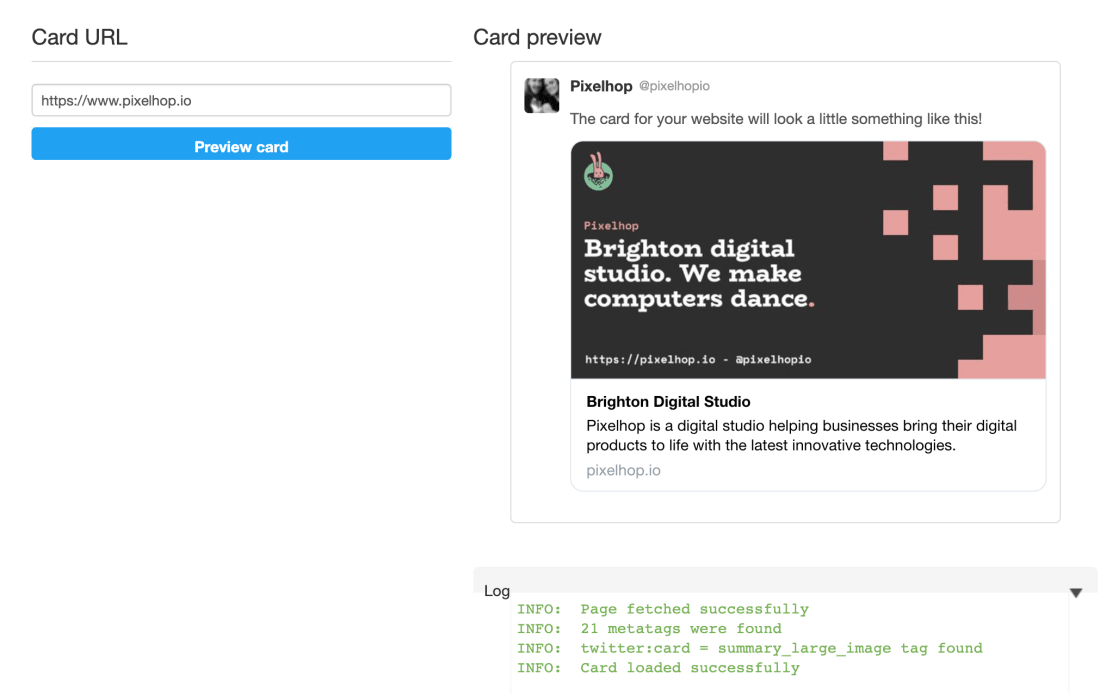
If you discover a lot of your content on social media as we do, you have no doubt seen an influx of professional-looking social sharing images being shared along with the content. If you don't know what we are talking about, check out a few examples below (including our own 😎)
Historically content editors would painfully create these images by hand in their tool of choice for each post, but now it's not too difficult to generate them with code.
We will be using Google firebase to host our cloud functions and static site, and Cloudinary to upload and host our generated social images.
Ok, so how is this going to work?
So, in summary, we will be creating a custom static HTML page that will form the basis of our social images. We will then render this page in a cloud function using Puppeteer, screenshot it and upload the result to Cloudinary.
To allow customisation of the social image content, the static page will accept query parameters to pass in content such as title, date and author etc.
Finally, we then use open graph and Twitter card meta tags to let social sites find your brand spanking new sharing images.
And that's all it takes; before you know it, you will have beautiful, customisable social images that can be used across your entire site and will make you stand out whenever your content is shared on socials.
Let's go!
Creating a social image template with Nuxt
Ok, let's begin by creating the template for our social image. In this tutorial, we will be using Nuxt and Vue.js as our frontend framework of choice, but you can apply the same concepts to whichever framework you prefer.
First things first, create a new Nuxt project:
npx create-nuxt-app open-graph-image-generator
If you want to follow this tutorial to the letter, here are the options we choose while setting up Nuxt:
Add a google font and configure TailwindCSS
We want our social image to look pretty, don't we? To make styling quick and easy, we've added TailwindCSS (other less controversial options are available), and to spice up our font game, we will add a Google font.
We went for the wildly over popular Inter font to look like authentic web people but if you want to stand out from the crowd, maybe pick something else. 😎
Add the required links to your Nuxt sites head by updating nuxt.config.js
Then register the font by creating a tailwind.config.js and adding the following:
Great, we now have a Nuxt site and a trendy web font; let's start the Nuxt dev sever:
npm run dev
Creating a Nuxt social image page
To create the template of our social image, we will be using a regular Nuxt page.
There is a lot of conflicting info about the perfect size to create and your social images. If you wanted to do a really great job, you should probably generate different size images for other platforms. To keep things simple, we will take the approach GitHub takes and generate a single image at 1600x800.
We recommend that you open dev tools, toggle the device toolbar, set it to responsive mode and fix the resolution to 1600x800 so you can see how the page will look at the correct size.
We will need the page to fill the full height of the browser, so add the following layouts/default.vue to make the app's container 100% height.
We are using a cute little plant icon from: flaticon.com
Now create a new file in the pages folder called open-graph.vue and add the following.
A fair amount is going on here, so let's break it down bit by bit.
Starting at the top of the template, you will notice that everything is wrapped in a <client-only> component. We don't want Nuxt to render any of the content on the page during generation as its contents will be changed dynamically using URL parameters. If we don't do this, we would probably get horrible hydration errors when we have conditional content.
Next up, we have the have the main wrapper for our content. This isn't meant to be a CSS tutorial, and for your own site, you could make a much nicer design, so we won't go into too much detail on the CSS/Tailwind. The main point is that it's a good idea to add a reasonably chunky border around everything, as well as comfy padding. This means that if your image gets cropped, the inner, more critical content hopefully is still visible.
We then add our plant company logo and name, and below that, we add a space for the main content of the social image. This will include important content such as a title and date, an author pic if there is one, and their name. Again this isn't a CSS tutorial, but flex is an absolute hero here for keeping everything centred nicely, however large the content becomes.
Using query parameters to customise content
Now we can get onto the secret sauce in how this component will allow us to create our dynamic social images. Notice the use of Vue router query parameters? This is going to allow us to customise our image by visiting its route with different parameters like this: [http://localhost:8080/open-graph?title=This is my page title](http://localhost:8080/open-graph?title=This is my page title)
In this case, the only required content is the title; the other elements are wrapped in a v-if so that they will only be shown if the content is passed in through their corresponding query param.
For the author image, we pass through a URL pointing to the image we want to use.
One thing to note is that we need to remember to URL encode the parameters we are sending through as query parameters; otherwise, we could break our URL.
Hopefully, you can see that by passing our content through as query parameters, we have created an easy to use API that allows you to configure your social images with whatever content you like. This is just a basic example, but you could add much more!
Before moving on to the next part, test it out in your browser (you may need to adjust your local Nuxt address):
Part 2: Rendering a social image in a cloud function
So now we have a page that we can customise and looks like a social image, but the problem is we can't use HTML as our social image.
To add a social image, you have to add several meta tags to your pages head. We will come back to this in more detail but its something like:
The "content" attribute must be a URL responding with an image; unfortunately, we can't just point it to an HTML page.
This means we need a way of converting the Nuxt page we created earlier into an image.
Enter the deadly duo of Firebase Cloud Functions and Puppeteer. We will use the headless browser tool Puppeteer to load our Nuxt template, screenshot it, and save it to Cloudinary.
We will be using Firebase cloud functions for this demo, but you could use any other cloud function provider.
Once you have done that, install the Firebase CLI and then authenticate with your account:
You should now be logged in to Firebase via the CLI, and we can start to set up the cloud functions.
In the same directory as your Nuxt installation run:
Choose "use existing" project and select the project you just created.
Once it's done, you should see a new functions folder has been created.
Start the Firebase emulator
The Firebase CLI gives us the option to run a local emulator, which will allow us to test our cloud function locally during development:
Great you should now be all set up; it's time to get cracking on our cloud function.
Inside functions/index.js, you should see that an example function has been scaffolded.
Before we go any further, let's install the dependencies our function will need. Inside the "functions" folder:
npm i puppeteer cloudinary object-hash --save
Now your dependencies are installed, let's look at implementing the first part of our cloud function, generating the image.
Let's work our way through the above code to understand what's going on.
Running Puppeteer is quite resource-intensive, so the first thing we need to do is set our function's runtime options to something a bit more suitable. We can create an options object and set the memory to 512MB and the timeout to 300 seconds. We can then tell our function to use the options with the "runWith" function before defining our HTTP function.
Let's skip over the delay function for the moment and look out how we define the cloud function. The index.js file has a single export called "generatePreview" that uses the Firebase functions page to create an HTTP endpoint (you can create functions triggered by things other than web requests).
The first thing we do inside the function is to extract the query parameters passed to it. You should notice that they mirror the parameters we have used in our Nuxt template.
Next up, we spawn a new headless browser using Puppeteer and set its viewport size to the size we need our image to render at 1600x800.
Next on the list is constructing the URL we will get Puppeteer to open. We use the vanilla URL class to add in our query parameters, and for the time being, we can point it at our local Nuxt dev server. We will need to change this before deploying.
Time to set Puppeteer to work. We tell it to visit our URL, wait until the page has loaded. We then add another slight delay using the delay function we skipped over earlier (this isn't great practice, and maybe someone more familiar with Puppeteer could let me know how to guarantee everything is loaded). Finally, we tell Puppeteer to screenshot the page, returning an image buffer.
Now that we have our image, let's return it as our functions response. For the time being, we can use a little trick to return the image buffer as a base64 string allowing us to view the image without saving it anywhere.
At this point, you should be able to test its working by visiting your local function URL in your browser. You should find it by looking in the console where you are running the Firebase emulators. It will look something like this:
http://localhost:5001/og-test-373ce/us-central1/generatePreview
Make sure to add in the query parameters to pass the content to Nuxt eg:
http://localhost:5001/og-test-373ce/us-central1/generatePreview?title=My awesome site
Hopefully, after a few seconds, the function will return with a perfect image rendering of your Nuxt template!
Caching our image to Cloudinary
We could deploy our function as is, and it would work. Every time a social network requests your social image, it would need to spin up Puppeteer and re-render it.
As you have just seen, this can take a few seconds and is quite resource-intensive. Cloud functions are cheap to run, but if possible, we don't want to keep re-rendering our images if their content hasn't changed.
One way to improve this would be to generate the image once, save it somewhere, and return the saved image the next time it's requested. For our purposes, we will use Cloudinary as our place to save the image.
Setting up Cloudinary
At this point, if you haven't already, go and create a Cloudinary account and grab your cloud name, API key, and API secret.
Once you have those, we need to give our cloud function access to them by setting its config.
We also need to download our remote config so it can be used by the local cloud function emulator too:
Now that you've done that take a look at our new code:
We create a new Cloudinary instance using the config we set in the previous step and make a const to prefix our Cloudinary folder.
The next new bit of code you'll see is:
// Get a unique id for our image based of its params
const imageId = hash(params)
As mentioned earlier, we only want to generate a fresh image if the content has changed. By creating a hash of the query parameters, we can generate an ID unique to that set of parameters.
Now before we generate a new image, we can use the ID to see if one already exists in our Cloudinary account:
If it does exist, we return the images URL as a redirect response from our Cloud function and entirely skip generating the image.
If it doesn't exist, we continue as we did previously, but once we have the image buffer, we upload it to Cloudinary.
Finally, rather than returning the base64 image string, we return the new Cloudinary image URL as a redirect response.
return response.redirect(301, image.secure_url)
Try calling your function again locally, and you should see the same image returned and saved into your Cloudinary library. If you rerun the function with the same parameters, it should return much quicker.
Deploying
By this point, everything has been tested and should be working locally. To use this on a live site, we need to deploy both the Nuxt site and our cloud functions.
Seeing as we are using Firebase cloud functions, we may also use Firebase hosting to deploy our static Nuxt site.
firebase init hosting
When asked, enter dist as your public folder, and don't configure it as a single-page app.
Next, build the Nuxt app to generate the dist folder:
npm run generate
Once it's done, we can deploy it to Firebase with:
firebase deploy --only hosting
It will take a little while to deploy, but once it is done, take note of the hosting URL.
We need to update our cloud function to use this URL rather than localhost.
//functions/index.js
const url = new URL('https://og-test-373ce.web.app/open-graph/')
Now we can deploy our finished cloud function too:
firebase deploy --only functions
Test the live version before moving on. You should see its URL output in the console, my URL with parameters looks something like this:
https://us-central1-og-test-373ce.cloudfunctions.net/generatePreview?title=10 Reasons to grow a cheese plant&authorName=Jozef Maxted&authorImage=https://i.pravatar.cc/150&date=22/05/22
Adding social images to Nuxt pages
Ok, we are so close to being done now. If you are still with me at this point, give yourself a massive pat on the back because we have covered a lot.
At present, we have a really cool way of generating perfectly sized social images, but now it's time to use them on our pages. We briefly mentioned early that this is achieved by adding meta tags to your pages head.
It can be helpful to create a helper function that takes info about your page and then outputs an array of meta tags ready to be passed into Nuxt's head configuration. In the example below, we output Open Graph meta tags that will be used by Facebook and other social networks and Twitter card tags that will be used to display your image on Twitter.
If you use this code, make sure to swap out the cloud function URL for your own and to replace the content specific to Pixelhop :)
We can then use the above function in any of our Nuxt pages:
If you want to use dynamic content from asyncData or similar, you can use the head function instead:
Testing Open Graph images
If you want to test your shiny new professional social images, there are a few good tools that can help.
Before that its worth opening up dev tools and checking you can see the correct meta tags output in your head. If it working correctly you should see tags similar to those below:
After adding head content to a page on your Nuxt site, build and deploy the frontend again:
npm run generate
firebase deploy --only hosting
Once its deployed, paste the URL of the page you want to test into both of these tools:
All being well, you should see a nice preview of new sharing images!
Taking it further
We hope you have enjoyed this post and look forward to seeing what you create as a result of it! Hopefully, using these techniques, you can make some really cool social sharing images.
There's plenty of room to take it further, too. Maybe you could create different templates for different types of page or pull in other data from third-party APIs, such as the weather at the time of posting?
As always, if you have any questions, let us know on Twitter: @pixelhopio, and if you liked this post and want more like this, we would really appreciate it if you subscribed to our newsletter or our Youtube channel. Bye for now!
Building a JAMstack shop with Strapi 4, Nuxt 3, Snipcart - part 2
This is part two in our series on how to create a JAMStack e-commerce site with Nuxt 3, Strapi 4 and Snipcart. We will build out the site’s structure, layout and any components we need in the process.
Building a JAMstack shop with Strapi 4, Nuxt 3, Snipcart - part 1
This series of articles will show you how to build a JAMStack e-commerce shop using the latest tech; Nuxt 3 for the front-end, Strapi 4 for the CMS backend, and Snipcart to power the e-commerce.
Creating an internationalised site with Strapi and Nuxt
We were really excited when Strapi released a new update a few weeks ago that included internationalisation! This post will show you the basics of creating an internationalised site using Strapi and Nuxt.